
Đang tải...
Đang tải...
15/03/2023
1. Wall/background treatment before tiling:
The surface to be prepared for tiling must be free of any defects and cracks. Whether new or old walls/floors, make sure the surface is clean, dry, swept or vacuumed and free of dust before installing a suitable primer.

A common question asked the most is whether it is possible to tile over an existing floor covering. While the answer is yes, it's best to get rid of everything and start from scratch. When you get rid of your existing floor, you're usually left with a solid concrete foundation like a new home's, which helps ensure any underlying issues are thoroughly addressed.
If you are planning to tile both walls and floors, it is advisable to start with the floor so that the wall tiles sit on top of the floor tiles. This ensures that water will flow down to the tile floor instead of into the grout joint or under the tile.
2. Go to Layout, choose the tile arrangement:
Think about tile layouts, placement of grout lines and cuts for a room that looks balanced and symmetrical. Door sills, floor obstructions will also need to be taken into account and always remember the saying measure twice, cut once.

First, find the center of the room. The simplest way to do this is to draw two lines that intersect at the center of the room. Start dry paving (laying tiles on the ground completely with no adhesive to plan the layout) one row of tiles (including spacers) out in one direction from the center point. One note is to make sure not to cut more than half of the tile on the last one. If you end up with less than half a tile, change the starting point of the layout to adjust.
Mixing floor tiles, and wall tiles is one of the simplest and most effective ways to express the creativity and aesthetic taste of the homeowner, in addition, it also makes the living space more impressive, unique, and attractive. become your pride every time a guest visits your home.
Note, if you want to cut tiles from the available tiles to apply the paving methods below, you should pay attention to the type of tile that can be cut. For example, 80×80 micro-brick you cannot cut into small sizes like 40×80 because the surface of this type of tile has a glass layer that when cut will lead to chipping, breakage, and loss of aesthetics. If you want to cut you can use granite tiles with simple modern color tones.
KHATRA would like to introduce to you 14 basic brick mixing methods:
3. Use lining:
Renovating a room or working in a completely new space, both need to ensure that the floor / wall is completely flat. While tile adhesive can help smooth out any minor protrusions, we recommend pouring a primer with self-leveling capabilities to smooth out larger crevices and protrusions. It is also convenient if you want to install a heating mat or bury the cable in the floor, it eliminates any potential damage to the cord.
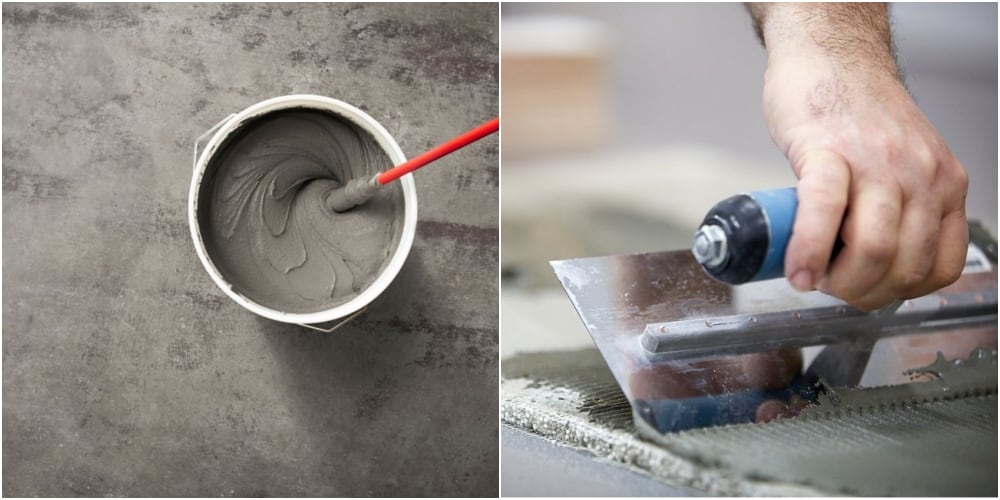
4. Adhesive:
A bad craftsman will blame his tools. Make sure your builder is using the right adhesive for the type of tile to be installed. Porcelain floor tiles must always be paved with flexible cement glue from a reputable brand. The high performance tile adhesive avoids some movements and vibrations, and provides exceptional adhesion to the floor.
5. Waterproofing:
If you're tiling a bathroom wall or bathroom floor, it's important to waterproof the base and seal the room. Even if the tile you use is a high-end Porcelain line, water can still seep through the grout joints into the subfloor below. So don't forget to waterproof the floor and wall before tiling to ensure a perfect result with longest tile life.
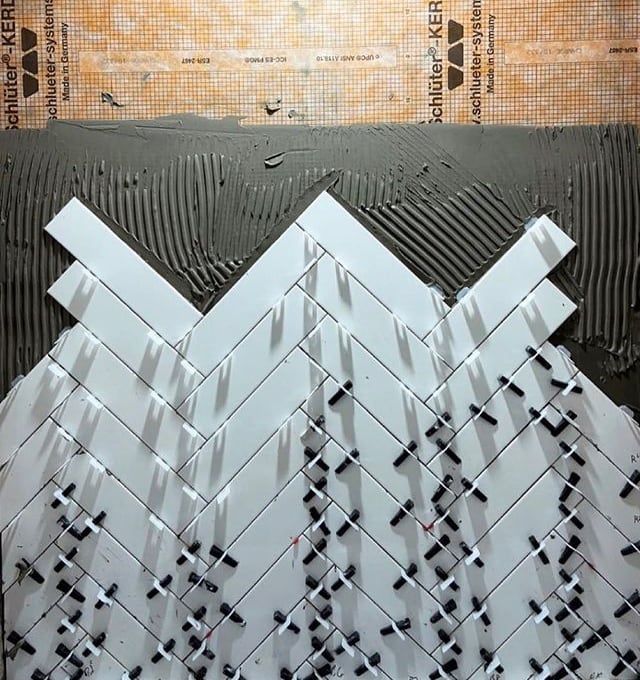
6. Leave grout between bricks:
Don't forget to use spacers between the tiles for consistent spacing and even grout lines throughout the tile installation. Gaskets must be able to be removed after the gasket has cured. Make sure to clean off any excess paint on the tiles and between the tiles as you move. It's much easier to clean while wet, as letting it dry can result in uneven surfaces.
7. Check the coverage of the adhesive layer between the tile and the floor:
It's time to lay bricks. When placing each brick on the wall or floor, press firmly and evenly. Rock the tile back and forth a little so that the thin grout breaks apart and fills in the grooves. This creates a thin solid layer underneath the tile. After doing this with the first brick, lift it back up and check to make sure there is about 80–90% thin coverage on the back of the brick. Check the consistency of the putty again if the coverage is not satisfactory.
Tin mới nhất

